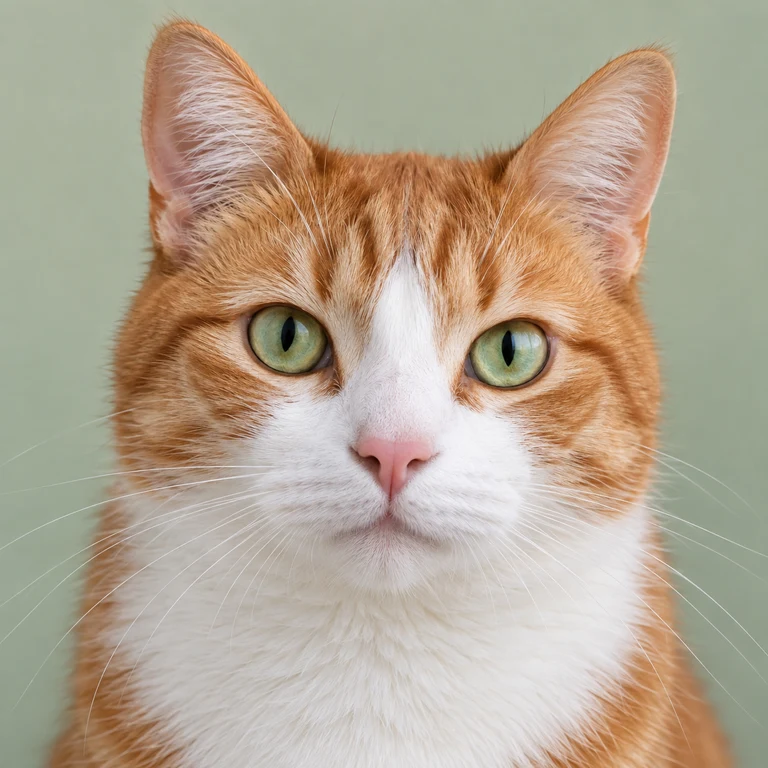
How big should a Perler bead pattern be? Start with the smallest grid that keeps the features you care about readable, then check its bead count against the time, materials, and pegboards you have. A wider grid creates room for detail. It also creates more positions to fill. There is no single width that suits every picture or board.
To make that choice visible, we converted the same cat image at three widths: 29, 52, and 80 cells. The source is the original AI-generated cat from our photo-to-pattern guide. We used the same documented background cleanup, Perler palette, 16-color limit, and conversion settings for every size. These are digital diagrams, not finished bead pieces.
If the measurements are unfamiliar, first check the difference between bead diameter, peg spacing and pattern cells.
Choose what must stay recognizable
Before moving the width slider, name two or three details that make your subject yours. For this cat, look at the space between its eyes, the pink nose, and the outline of its ears. At a small width, the orange-and-white silhouette may still read as a cat while the face loses separation. If you only need a simple icon, that may be fine; for a portrait, the eyes may matter more.
Crop the source so the subject uses the available grid. If most cells describe an unneeded background, increasing the width spends more positions on that background too. Our example uses the same close framing and background cleanup at all three sizes. The cleanup is imperfect—it removes a few fine whisker tips—so a wider grid cannot bring those missing parts back.
Compare one image at three grid widths
Tap a diagram for its full-size digital view. All three use square color blocks with cell lines; the display style, source, palette, color limit, and background treatment are held constant. Only Pattern width changes. The square source gives a square grid; another image may produce a different height.
29 × 29
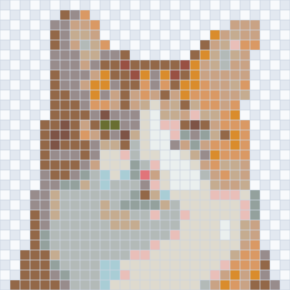
552 beads · 16 colors. The silhouette reads; facial features are crowded.
52 × 52
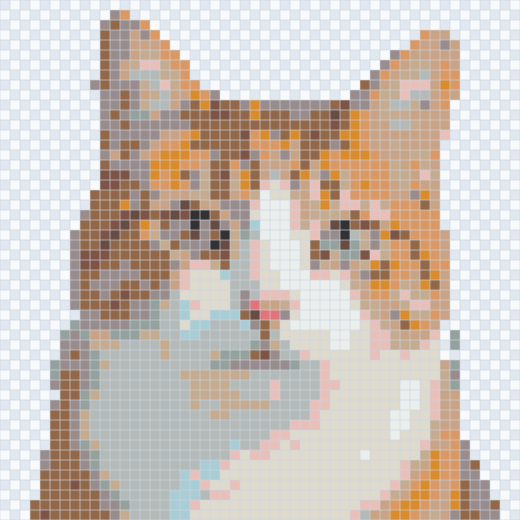
1,752 beads · 16 colors. The eyes and nose are easier to separate.
80 × 80
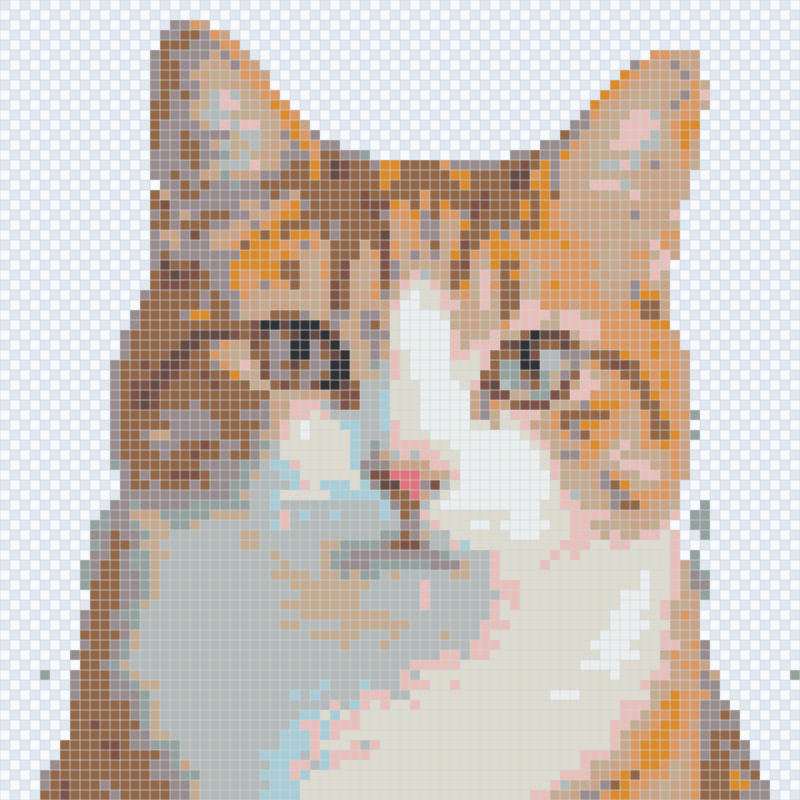
4,124 beads · 16 colors. More fur patches appear, along with many more cells to follow.
For this image, 52 cells is a reasonable point to inspect closely: the main facial features are clearer than at 29, without the extra 2,372 beads in the 80-cell version. That is an example judgment, not a recommended size for every pet portrait. Zoom in and decide whether the extra cells actually preserve something you value. The 80-cell view adds small fur variations, but does not guarantee a better physical color match or finished result.
Keep grid positions and bead count separate
Pattern width is the number of columns in the digital grid. It is not the number of image pixels, the finished width in centimeters, or the number of beads you need. Empty checkerboard positions remain part of the grid but need no bead; white is a bead color and does count. Here are the actual counts from the three converted grids:
| Grid | All positions | Beads to place | Empty positions | Colors used |
|---|---|---|---|---|
| 29 × 29 | 841 | 552 | 289 | 16 |
| 52 × 52 | 2,704 | 1,752 | 952 | 16 |
| 80 × 80 | 6,400 | 4,124 | 2,276 | 16 |
A wider grid does not necessarily use more different colors: all three examples use 16 Perler colors under the same limit. It does use more occupied positions here, so the material list changes even though the color limit does not. Check the actual bead count after conversion; do not estimate it by multiplying width by height unless every cell is filled.
Check your own pegboard before committing
Count the usable pegs across and down on the board you own, and confirm which bead series it supports. Compare both numbers with the full grid, not just the colored silhouette. If the pattern is wider or taller than your available layout, consider compatible interlocking boards, a smaller pattern, or a different crop. A 29-cell preset in an editor is a starting value, not a universal pegboard specification.
Perler’s Boxer project uses four of its large square pegboards for a larger design; Perler also sells interlocking clear square boards. Those are examples of one brand’s materials, not proof that your boards have the same peg count or spacing. Check your specific product before planning a join.
Physical size depends on the spacing of your actual pegs and the beads you use. A PNG’s pixel width cannot establish it. Even if a pattern appears to fit by peg count, a printed page must be checked for scale before it can sit under a clear board.
If you print, test the scale first
The pattern maker can export a PDF · Beta with pages divided by pegboard or by paper. The overview page is for orientation, not actual size. Enter your own board’s peg counts and spacing rather than assuming the initial values describe your board.
Print the calibration page first at 100% / Actual Size, with “Fit to page” off. Measure both 100 mm lines with a physical ruler, adjust from the measured values if necessary, print a fresh test page, then compare its peg positions with your clear board. The reading guide’s PDF section walks through that check. The PDF software has not been verified against every printer or board; the screen preview cannot confirm physical fit.
Make a choice you can explain
Start with a modest width, compare the important details, and move up only if the new cells resolve a problem you can see. Before settling on a size, check three things: Are the important features still distinct? Can you prepare the listed bead quantities? Can the full grid fit the boards or page layout you will use? If the subject is still muddy at a wider width, try a closer crop or a clearer source image instead of adding cells indefinitely.
You can make a pattern from your own image and compare widths in Pattern preview before creating a draft. If you already have a chart and need help with color codes or empty cells, continue with how to read a bead pattern.