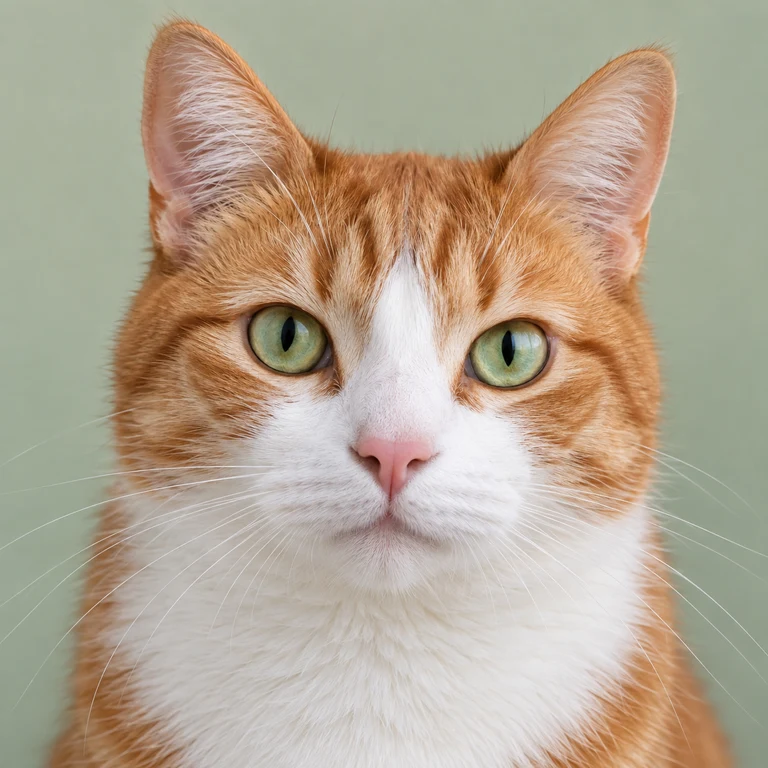
A photo contains more detail than a small grid can hold. Turning it into a bead pattern means deciding what to keep: the shape of a face, a pair of eyes, or the outline that makes your subject recognizable.
This guide takes you from a picture to a digital pattern with a color list and bead counts. You do not need an account. You can follow along with your own image, or download the cat source image and save it to your device first.
What you’re looking at: the cat source image was AI-generated for this guide. Every grid shown here was produced by ImageToBeads’ conversion code. These are digital examples, not photos of a finished bead piece. They do not predict physical bead colors or ironing results.
Choose how your pattern looks
The three pictures below show the same pattern: 52 × 52 cells, 16 Perler colors, and 1,752 beads after background cleanup. Choose the view you find easiest to read; changing its appearance does not change any bead positions, colors, or counts.
Squares
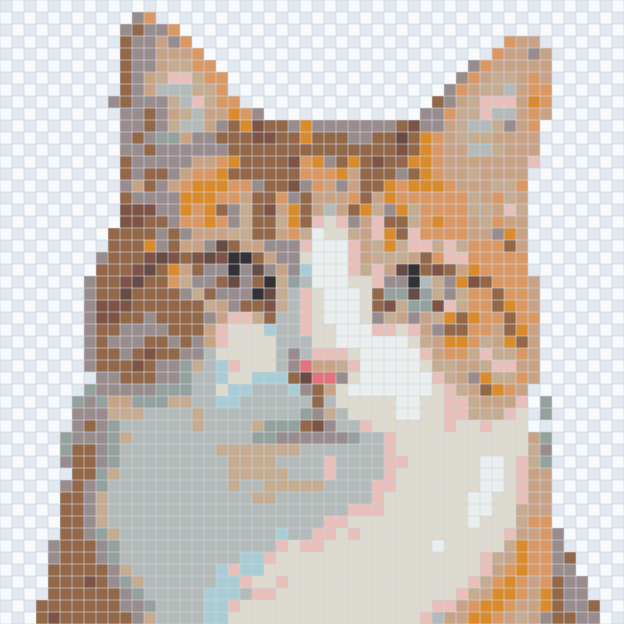
Continuous color blocks make the overall shapes easy to compare.
Dots
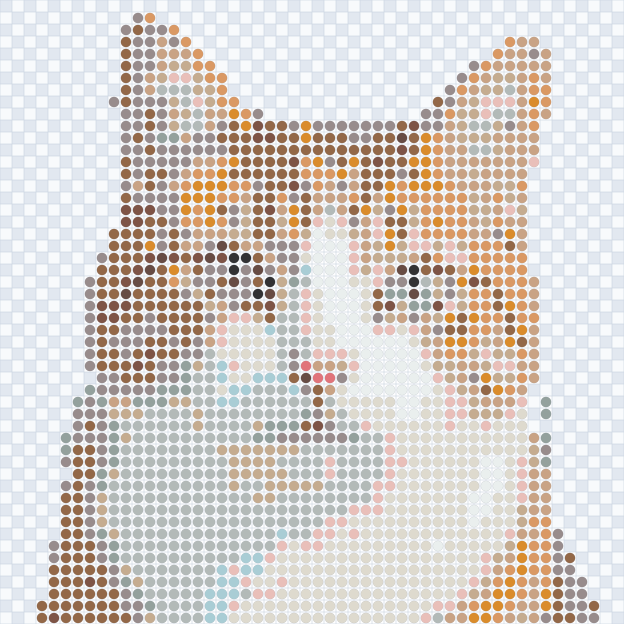
Separate circles make individual bead positions stand out.
Beads
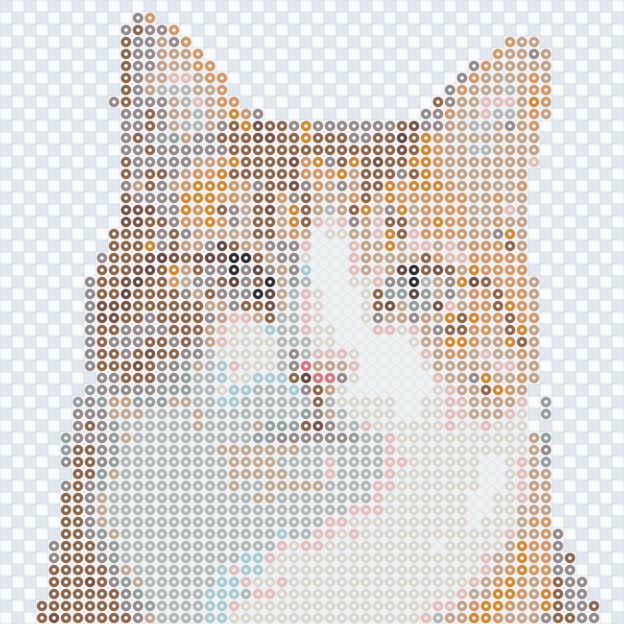
A center-hole drawing gives each position a bead-like appearance.
Perler’s own Pelicans project pattern uses circles. Squares are our default display, not an official Perler format requirement. You can choose any of these three views in View → Pattern appearance after creating a pattern, or in Export → Pattern appearance before downloading. Export still produces a PNG; these are display styles, not three file formats. If a cell shows a short color code, the text takes priority over the bead hole.
Choose your image
For a first attempt, look for one clear subject, a simple background, and a shape you can still recognize when the picture is small. A pet’s face is a useful starting point. A distant pet surrounded by grass gives the grid much more information to squeeze into the same space.
Fine fur, tiny lettering, and soft shadows may disappear or become small patches of color. A higher-resolution photo does not remove that trade-off: the final grid still has a limited number of cells.
Open the pattern maker and select Choose an image. A JPEG or PNG is a straightforward starting point. Conversion happens in your browser; your source image is not uploaded to create the pattern.
Frame the subject
In the creation window, select Adjust image to adjust the area you want to keep. Crop closer if the subject takes up only a small part of the picture. Keep enough space for features such as ears, and check Pattern preview after making a change.
Cropping removes the edges of a picture. It does not remove a background that is still inside the crop. If you want empty space around a subject, use the image preparation tools and review the outline carefully. For this cat, removing the pale green background keeps the pattern focused on the face.
White is a bead color, not an empty cell. A white background can still add beads to the pattern. Empty cells are positions where no bead is placed.
Use Adjust & remove background → Edit background → Click regions. For this image, start at Color tolerance 8, click the upper-left background, then the separate lower-right and lower-left areas. Our example uses points about 5% across / 5% down, 98% / 90%, and 2% / 90%. Set the tolerance for each region; the slider changes only the latest region.
Finish with the Erase brush along the far-right edge beside the cheek to clear the remaining background flecks. We used the largest brush size (a radius of 7.5% of this square image), from about 96.5% across / 63% down to 96.5% / 77%. This also removes fine whisker tips in that area. Check the ears, cheeks, and white chest before returning to Pattern preview. At tolerance 12, this image lost some white chest fur, so increasing tolerance is not always better. Undo or use the restore brush if the subject is damaged.
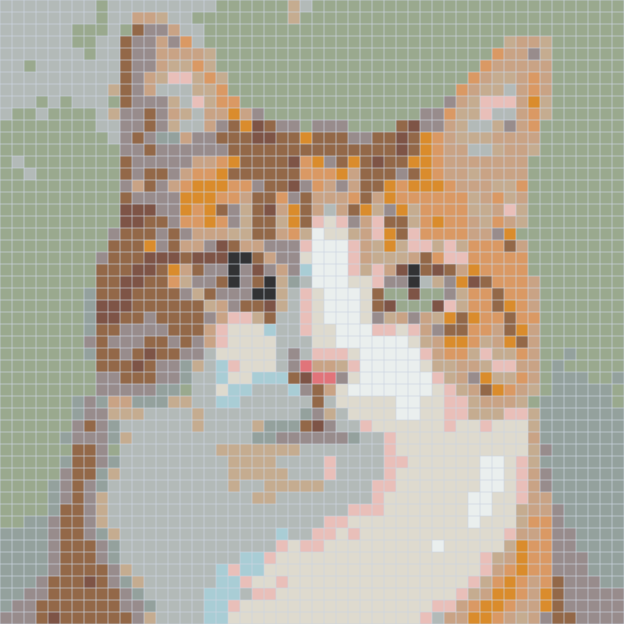
Choose a grid size
Set Pattern width to a starting size, then inspect the preview. The height follows the proportions of your selected image. The number refers to cells across the pattern, not the pixel width of the downloaded PNG.
For this square cat image, compare 29 cells across with 52. Both examples use the same Perler palette and a 16-color limit. Both use the background cleanup above; empty cells do not count as beads.
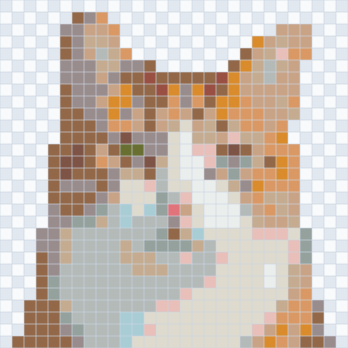
The larger grid gives the eyes and nose more room, but also contains more than three times as many beads. It still does not preserve individual whiskers or all the fur detail. Choose a size by checking the features you care about, rather than assuming that the largest option is always the right one.
The 29, 52, and 104 shortcuts are convenient starting points, not universal pegboard sizes. Check your actual bead series and pegboard before planning a physical project. This guide does not verify board fit.
Choose colors
Select the Bead palette that matches the beads you intend to use. We used Perler for this example. Changing the palette changes the available color references, so it can change the appearance of the grid too.
Maximum colors sets an upper limit, not a promise to use exactly that many colors. Try lowering it, then compare the parts of the picture that matter. Here is the same 52 × 52 grid at limits of 16 and 8 colors.
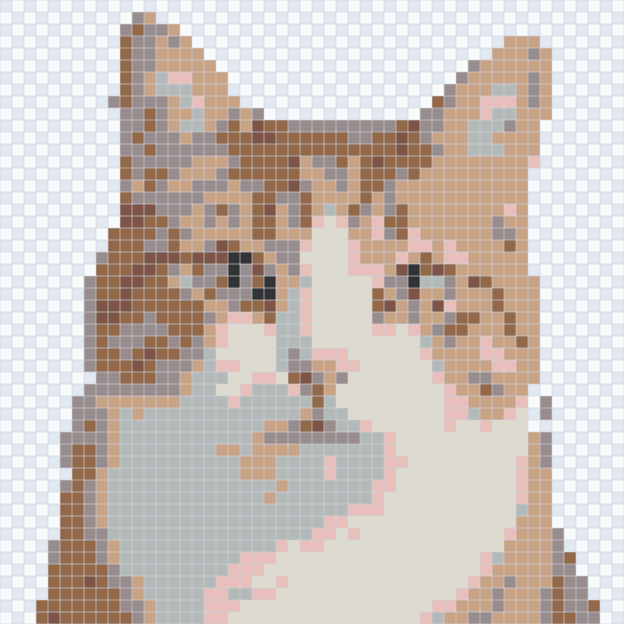
Fewer colors mean fewer distinct color codes in the list. They can also merge shades you wanted to keep. Zoom in on the eyes, nose, and outline before deciding. Screen colors are approximate references, so the preview should not be treated as a photograph of the beads you will receive.
For a first comparison, leave dithering off. Dithering can represent gradients with alternating colors, but adds scattered color points. It is a choice to inspect, not an automatic quality improvement.
- Source: the downloadable 768 × 768 cat image; full square frame; background removed with three region clicks and one erase-brush stroke as described above.
- Pattern: 52 × 52 cells; Perler palette; maximum 16 colors; dithering off.
- Result: 16 colors and 1,752 beads, with 952 empty cells.
- No color adjustments, simplification, or manual grid edits; only the source-background cleanup above.
Check and edit
Once the preview is a useful starting point, select Create pattern to open the editor and save your current draft. ImageToBeads keeps one draft in this browser. If you already have one, confirming the new pattern replaces it; export anything you want to keep first.
Look at the grid both as a whole and zoomed in. Ask a few specific questions:
- Are the eyes still separate? Is the mouth or nose readable?
- Is a lone dark cell an unwanted speck, or an important feature?
- Did background colors become mixed into the outline?
- Are there colors used by only one or two cells that you want to review?
Use the brush or eraser for individual cells. Simplify offers previews for merging rarely used colors and isolated single beads. Review those changes before applying them: a single-cell highlight can be worth keeping. Use undo if an edit removes something important.
If the whole face needs more room, Regenerate lets you return to the source image and conversion settings. It starts from the image, not from your hand-edited grid. Review the new preview before confirming; regeneration can replace those manual edits.
Export your pattern
Open Export, check the preview, then select Download PNG. The PNG includes the full grid, color swatches, and quantities. You can choose whether to show grid lines and color codes for that export.
With Show color codes on, the materials list includes the official palette codes. Only short official codes that fit are displayed inside cells; long Perler codes belong in the list. Blank cell labels do not mean those cells are empty.
Open the downloaded file and check that you can read the grid and materials list. Keep that file somewhere you can find it again. Local autosave is useful for returning to an unfinished pattern, but browser cleanup, private browsing, or storage limits can remove a draft.
The PNG is a digital reference. Its dimensions on a screen or printer do not establish a one-to-one match with your pegboard, and its colors do not guarantee a physical match.
Once you have a chart, our guide to reading a bead pattern shows how to tell white beads from empty cells, check the materials list, and follow one color at a time.
When it doesn’t look right
The face looks muddy
Try a closer crop or a wider grid, then compare again. If neither helps, use a clearer image with stronger shapes. Increasing the color limit cannot restore a feature that has already collapsed into too few cells.
The picture has too many tiny color patches
Try a lower color limit and inspect the result. You can also preview the simplification options in the editor. Keep intentional small details rather than accepting every suggested change.
The background adds too many beads
Crop out the parts you do not need, or use the image preparation tools to remove background areas. Review the subject’s edge afterward. Making a background white does not make it empty.
The colors differ from the photo
A bead palette offers a fixed set of color references, so some source colors must be replaced. Check that you selected the intended palette, then compare color limits. Neither more colors nor a larger grid guarantees a match to the original photo—or to physical beads.
You want to keep two versions
Download a PNG before replacing or regenerating the current pattern. The browser holds one current draft, not a project library. A PNG preserves the exported view; it is not a backup of the editor’s history.
About this example. Prepared with ImageToBeads’ current conversion code and the Perler palette snapshot beadcolors-f97ff428, checked September 20, 2026. The cat image was generated for this guide; the grids were rendered from actual conversion data. No physical bead piece was made or tested. For how local processing and optional sharing work, see our privacy notice.