A pattern can use fewer colors without using fewer beads. Start by deciding what you want to simplify: the number of colors to prepare, or the scattered single cells that make a chart harder to follow. Those are different problems, and the same change may not solve both.
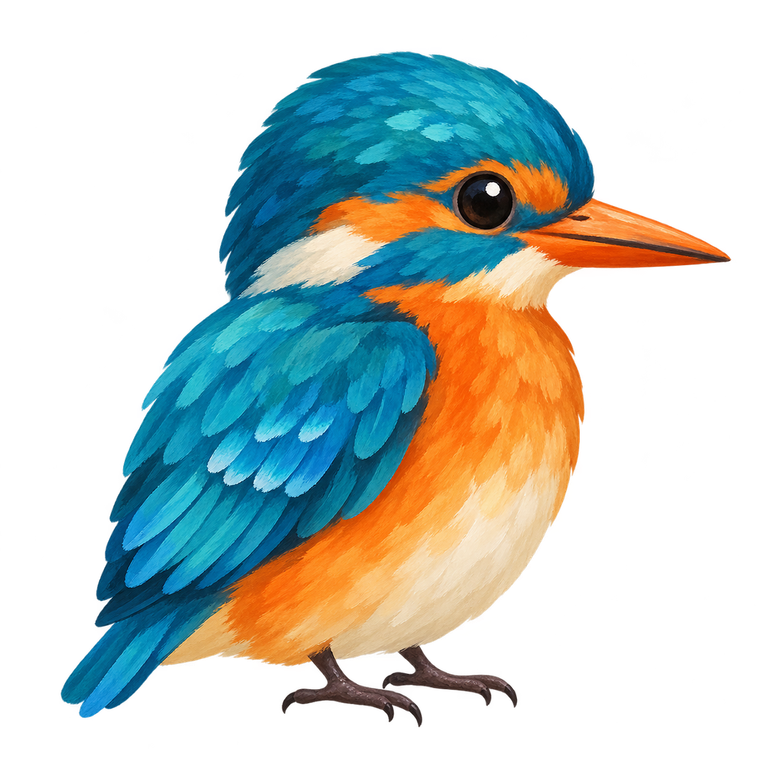
This guide follows one AI-generated bird through the actual ImageToBeads converter. We keep the transparent source, 52 × 52 grid, Perler palette, and other settings fixed, then compare 8, 16, and 24 colors. After that, we try two editing tools separately on the 24-color version. Every pattern shown is a digital diagram, not a physical bead sample.
Decide what needs to get simpler
If the materials list asks for too many different colors, try a lower Maximum colors setting before creating the pattern. That setting is a ceiling: a result may use fewer colors than you allow. The full palette is the set of available colors; the actual color count is the number used in this particular chart. Our palette and color-code explainer separates those ideas.
If the list is manageable but there are tiny scattered patches, inspect the chart before changing anything. A single dark cell might be noise—or an eye. A pale cell might be an unnecessary shade—or a useful highlight. Low usage alone cannot tell you which details matter.
First name what you want to keep. For this bird, we care about the dark eye, the orange beak and chest, and the division between the blue wing and pale belly. A close crop and a suitable pattern size help those features survive before you start reducing colors.
Compare 8, 16, and 24 colors
All three versions below contain 1,119 beads and 1,585 empty positions. Only the color limit changes. Tap a diagram to open the full image; the square cells are a display style, not a prediction of finished beads.
8 colors
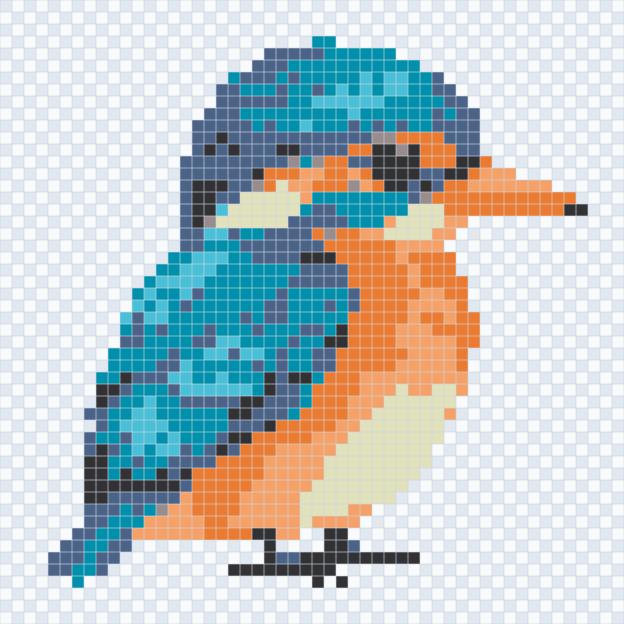
8 colors used · 1,119 beads. Broad color areas carry the picture.
16 colors
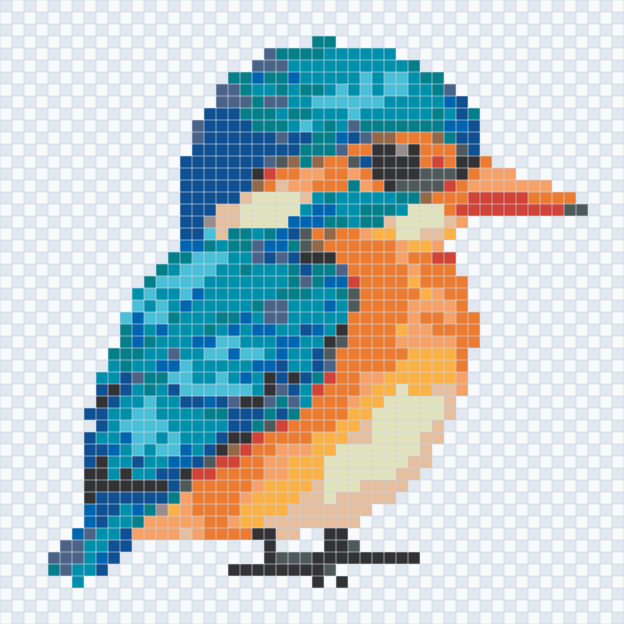
16 colors used · 1,119 beads. More shading to compare and prepare.
24 colors
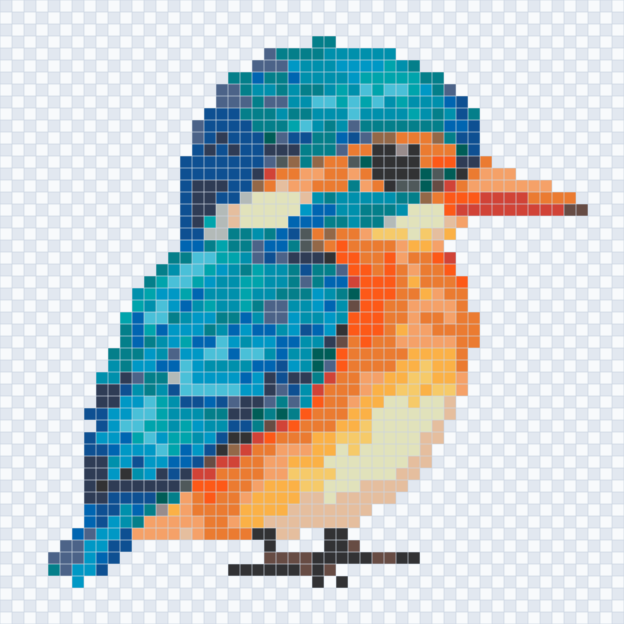
24 colors used · 1,119 beads. Extra shades add small color patches.
For a simpler chart, the 8-color result is worth considering: the bird’s blue-and-orange shape remains recognizable. The 16-color version gives more tonal choices; the 24-color version adds smaller variations. This is a choice about this image, not a rule that one setting is best. Compare the face and the boundary between wing and belly rather than assuming a higher number preserves every feature.
Changing the limit runs a new conversion. It does not simply remove the least-used colors from the previous chart, and it does not preserve a chosen set of colors. If you have already edited a pattern, treat regeneration as a new candidate and inspect it before confirming.
You can download the transparent bird source to try the comparison yourself. In the pattern maker, keep the width at 52 and palette at Perler, then compare the color limits in Pattern preview before creating your draft.
Merge colors used by only one or two beads
In the workspace, open Simplify → Merge rarely used colors. It finds colors used by only one or two beads across the whole pattern and replaces them with a similar color already used more often. It does not look for a similar color next to each bead, and it does not know whether a rare shade is an important detail.
In our 24-color bird, color 80-15260 appears twice. The operation recolors those two cells and takes the chart from 24 to 23 colors. One cell is near the eye; the other is on the lower wing. All 1,119 bead positions remain occupied. The enlarged head comparison below includes the changed face cell.
That is a small reduction, which may be enough if it removes a color you would otherwise need just twice. It is not a shortcut from 24 colors to 8. If no colors meet the rule—or there is no more-used color to replace them with—the tool can correctly report no changes.
Check isolated cells before merging them
Merge isolated single beads addresses a different issue: a single cell that has no same-color neighbor above, below, left, or right. Where an eligible neighboring color area exists, it recolors the cell to join that area. A frequently used color can still have many isolated cells.
We ran this operation on a fresh copy of the original 24-color chart, not on the rare-color result. It recolored 215 cells but reduced the palette by only one color. Both tools ended at 23 colors, with very different amounts of change.
Original
24 colors in the full chart.
Rare colors merged
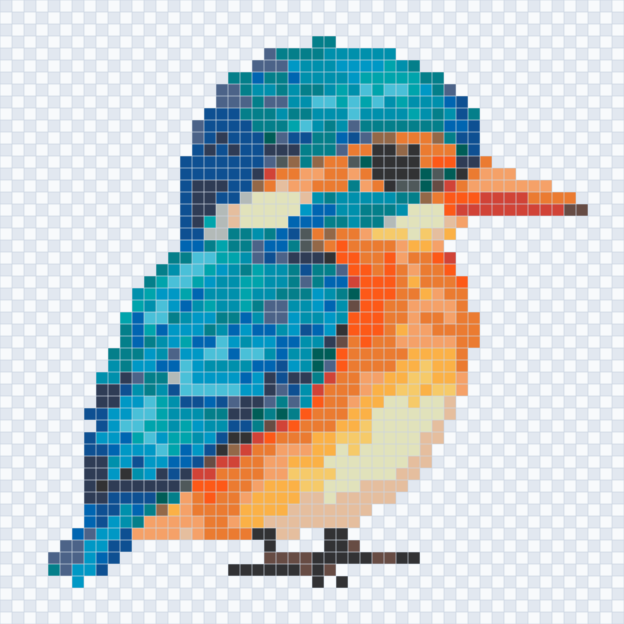
23 colors · 2 cells recolored across the full chart.
Single cells merged
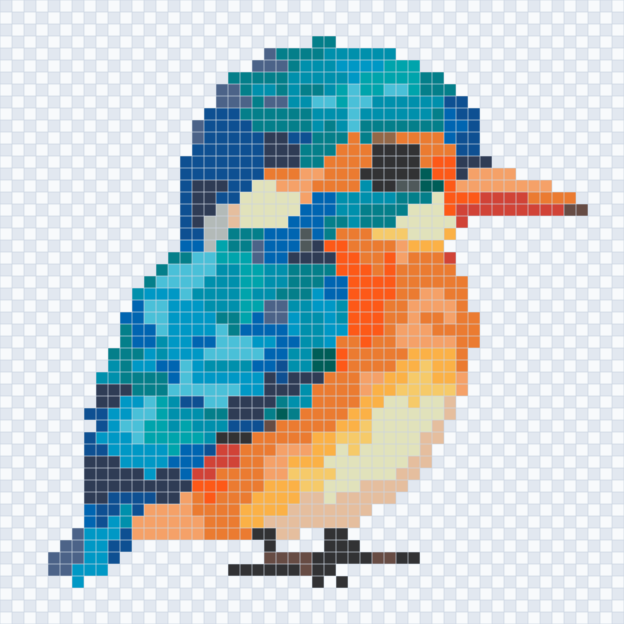
23 colors · 215 cells recolored across the full chart.
Look at the eye edge, the cheek and the beak base. Joining small patches can make some areas more uniform, but it also changes the shapes that describe the face. Neither tool recognizes eyes or protects highlights. A tidier-looking area is not automatically a more faithful one. If only a few cells bother you, cancel the bulk preview and edit those cells individually instead.
Preview, apply, then check the list
Choose one operation and switch between Before and After. Inspect the important features close up, then zoom out to check the whole subject. The preview has not yet changed your saved pattern. Use Cancel preview if the result loses a detail you want; choose Apply changes only when you prefer it. An applied operation can be undone.
Both operations recolor existing beads. They do not erase bead positions, fill empty cells, or reduce the bead total. Do not use a color’s low count as a reason to erase it: white is a real bead color too, while an empty position means no bead. The reading guide explains that distinction and the materials list.
After applying a change, check the updated color codes and quantities before exporting. The figures for this example make the tradeoff explicit:
| Version | Colors used | Beads | Cells recolored from the 24-color chart |
|---|---|---|---|
| Original 24-color conversion | 24 | 1,119 | — |
| Merge rarely used colors | 23 | 1,119 | 2 |
| Merge isolated single beads | 23 | 1,119 | 215 |
Stop when the remaining colors earn their place
Keep a color if it separates features you care about, even when it appears only once. Merge it if you prefer the result and the simpler materials list helps you. You do not have to use either simplification tool after conversion.
If the pattern still feels too busy, revisit the source crop, background or grid width using the photo-to-pattern guide. Reducing colors cannot rescue every crowded source. These comparisons show changes in digital charts only; they do not establish physical color accuracy, ironing results or the strength of a finished piece.
Prepare your image if the subject is too small or the background is distracting.
Change brands and replace missing colors with an interactive example.